Kalliope requirements for Raspberry Pi OS
Kalliope can be installed:
Install via script
Just run the following bash command to install Kalliope on a freshly installed Raspberry Pi (32bit):
bash -c "$(curl -sL https://raw.githubusercontent.com/kalliope-project/kalliope/master/install/rpi_install_kalliope.sh)"
Manual installation
Note: It is recommended to use a lite installation of Raspberry Pi OS without any graphical interface for a better experience.
Note: The first Raspberry Pi is not officially supported. The installation will works but a single core with only 700Mhz may produce latency.
Note: Python 2 is not supported anymore
Note: Raspbian was renamed to Raspberry Pi OS
Debian packages requirements
Install the required system libraries and software:
sudo apt-get update
sudo apt-get install -y git python3-dev libsmpeg0 \
    flac libffi-dev portaudio19-dev build-essential libssl-dev libatlas3-base mplayer libyaml-dev libpython3-dev libjpeg-dev ffmpeg pulseaudio
On Raspberry Pi OS Buster, the default TTS engine is not installable directly from the package manager. Run command below to install it manually:
wget http://ftp.fr.debian.org/debian/pool/non-free/s/svox/libttspico-utils_1.0+git20130326-9_armhf.deb
wget http://ftp.fr.debian.org/debian/pool/non-free/s/svox/libttspico0_1.0+git20130326-9_armhf.deb
wget http://ftp.fr.debian.org/debian/pool/non-free/s/svox/libttspico-data_1.0+git20130326-9_all.deb
sudo dpkg -i libttspico-data_1.0+git20130326-9_all.deb
sudo dpkg -i libttspico0_1.0+git20130326-9_armhf.deb
sudo dpkg -i libttspico-utils_1.0+git20130326-9_armhf.deb
Install the last release of python-pip:
wget https://bootstrap.pypa.io/get-pip.py
sudo python3 get-pip.py
Note: Python 2 is not supported anymore
Method 1 - User install using the PIP package
You can install kalliope on your system by using Pypi:
sudo pip3 install kalliope
Method 2 - Manual setup using sources
Clone the project:
git clone https://github.com/kalliope-project/kalliope.git
cd kalliope
Install the project:
sudo python3 -m pip install .
Method 3 - Developer install using Virtualenv
Install the python-virtualenv package:
sudo pip3 install virtualenv
Clone the project:
git clone https://github.com/kalliope-project/kalliope.git
cd kalliope
Generate a local python3 virtual environment:
virtualenv venv -p /usr/bin/python3
Activate the local environment:
source venv/bin/activate
Install Kalliope
python3 -m pip install .
Method 4 - Developer, dependencies install only
Clone the project:
git clone https://github.com/kalliope-project/kalliope.git
cd kalliope
Install the python dependencies directly:
sudo pip3 install -r install/files/python_requirements.txt
Raspberry Pi configuration
This section deals with the special configuration needed to get Kalliope working on a RPi.
Pulseaudio configuration
Note: If you installed Kalliope via script, you can skip this part
Add the pi user to the group pulse-access to allow to use the audio device:
sudo usermod -a -G pulse-access pi
Setting up default client settings by adding default server and disable autospawn to client.conf:
echo "default-server = /var/run/pulse/native" | sudo tee -a /etc/pulse/client.conf
echo 'autospawn = no' | sudo tee -a /etc/pulse/client.conf
Create a pulseaudio service in /etc/systemd/system/pulseaudio.service
[Unit]
Description=PulseAudio system server
After=network.target

[Service]
Type=notify
ExecStart=pulseaudio --daemonize=no --system --realtime --log-target=journal
Restart=always
RestartSec=30

[Install]
WantedBy=multi-user.target
Or use this command to download the script and move it to /etc/systemd/system/:
wget https://raw.githubusercontent.com/kalliope-project/kalliope/master/install/files/pulseaudio.service && sudo mv pulseaudio.service /etc/systemd/system/
There is a bug if you use the analog jack output of the raspberry with pulseaudio, the audio player needs about 2 seconds longer to start the audio.
To speed it up add the following to the end of /etc/pulse/system.pa:
echo 'load-module module-alsa-sink device="hw:0,0"' | sudo tee -a /etc/pulse/system.pa
echo 'set-default-sink alsa_output.hw_0_0' | sudo tee -a /etc/pulse/system.pa
We disable load-module module-suspend-on-idle in /etc/pulse/system.pa
sed -e '/load-module module-suspend-on-idle/ s/^#*/#/' -i /etc/pulse/system.pa
Now reload systemctl, start the service and enable it at startup:
sudo systemctl daemon-reload
sudo systemctl start pulseaudio
sudo systemctl enable pulseaudio
Microphone and speaker configuration
Get the output card:
pactl list sinks short
Output example with a speaker connected to the Raspberry jack:
0   alsa_output.platform-soc_audio.analog-mono  module-alsa-card.c  s16le 1ch 44100Hz   IDLE
1   alsa_output.hw_0_0  module-alsa-sink.c  s16le 2ch 48000Hz   IDLE
Here we see that: - the analog audio (where the jack is connected) is on card 0 - the fixed output (with less delay on pulseaudio) on card 1
Note: If you use a USB sound card for output there is no delay at all.
Get the input (microphone card):
pactl list sources short
Output example with a PS3 eye (which has a great Mircophone array for a cheap price) connected:
0 alsa_output.platform-soc_audio.analog-mono.monitor  module-alsa-card.c  s16le 1ch 44100Hz SUSPENDED
1 alsa_input.usb-OmniVision_Technologies__Inc._USB_Camera-B4.09.24.1-01.multichannel-input  module-alsa-card.c  s16le 4ch 16000Hz SUSPENDED
Here we see: - analog-mono.monitor which is used for e.g stereo mix (What we don't need) - The PS3 eye USB camera with the built in microphone array
Now we can set our desire default input and output device.
To set the default output to the analog audio jack of the raspberry:
pactl set-default-sink 1
To set the default input, in this case the PS3 eye:
pactl set-default-source 1
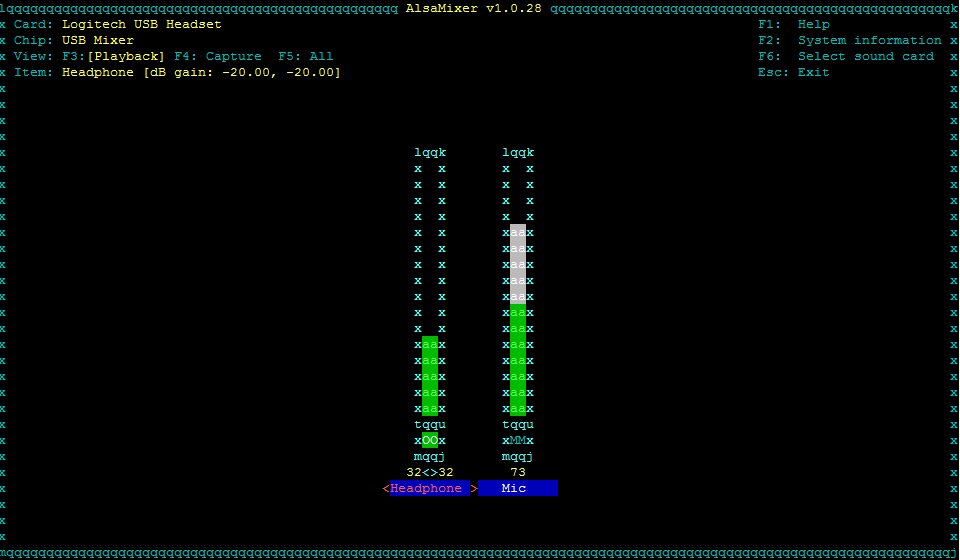
Adjust the microphone sensibility by running alsamixer:
alsamixer
By pressing F5 you can set the microphone sensibility and speaker level for pulseaudio:
Note: After changing the default input or output, you have to restart Kalliope
HDMI / Analog audio
By default, the audio stream will use HDMI if something is plugged into this port. Check the official documentation to switch from HDMI to analog.
sudo raspi-config
Configure your locales
Locales defines language and country specific setting for your programs and shell session. To set system’s locale you need use shell variable. For example, LANG variable can be used to set en_US (English US) language.
Check current locales:
locale
To update your locale, type the command bellow:
sudo dpkg-reconfigure locales
Select in the list the locales of your country, by selecting the code with UTF8, example:
- de_DE.utf8
- en_GB.utf8
- fr_FR.utf8
- es_ES.utf8
Then, update your /home/pi/.bashrc file by exporting the language. Example:
export LC_ALL="en_US.UTF-8"
export LANG="en_US.UTF-8"
export LANGUAGE="en_US.UTF-8"
Source the file to handle changes
source /home/pi/.bashrc
Test your env
Check your microphone and speaker config
To ensure that you can record your voice, run the following command to capture audio input from your microphone:
rec test.wav
Press CTRL-C after capturing a sample of your voice.
Then play the recorded audio file
mplayer test.wav
Your installation is now complete, let's take a look now to the getting started documentation to learn how to use Kalliope.
(Optional) Start Kalliope automatically after a reboot
If you want to start Kalliope automatically:
Place the script bellow in /etc/systemd/system/kalliope.service.
Update the path <my_config_path> with the path where you've placed your brain.yml and settings.yml.
Update the <username> with a non root user. For example, on Raspbian you can set pi.
[Unit]
Description=Kalliope
After=pulseaudio.service

[Service]
WorkingDirectory=<my_config_path>

Environment='STDOUT=/var/log/kalliope.log'
Environment='STDERR=/var/log/kalliope.err.log'
ExecStart=/bin/bash -c "/usr/local/bin/kalliope start > ${STDOUT} 2> ${STDERR}"
User=<username>

[Install]
WantedBy=multi-user.target
E.g
[Unit]
Description=Kalliope
After=pulseaudio.service

[Service]
WorkingDirectory=/home/pi/my_kalliope_config

Environment='STDOUT=/var/log/kalliope.log'
Environment='STDERR=/var/log/kalliope.err.log'
ExecStart=/bin/bash -c "/usr/local/bin/kalliope start > ${STDOUT} 2> ${STDERR}"
User=pi

[Install]
WantedBy=multi-user.target
Create both log files and give rights to you user
sudo touch /var/log/kalliope.log
sudo touch /var/log/kalliope.err.log
sudo chown pi:pi /var/log/kalliope*
Then, reload systemctl, start the service and enable it at startup
sudo systemctl daemon-reload
sudo systemctl start kalliope
sudo systemctl enable kalliope
Check that the service is ok
sudo systemctl status kalliope